How to execute a throw-in

Not practised enough, a bad throw-in can cost you during a game. For example, a defensive throw-in badly taken can become a foul throw that gives an attack opportunity to your opponents. This post goes over a few tips to improve your throw-ins.
The basic rules
Often bad throw-ins are the result of not knowing the rules well. The specific rules on throw-ins are known as Law15 and specify the following procedure:
- Stand facing the field of play.
- Have part of each foot on the touchline or the ground outside the touchline.
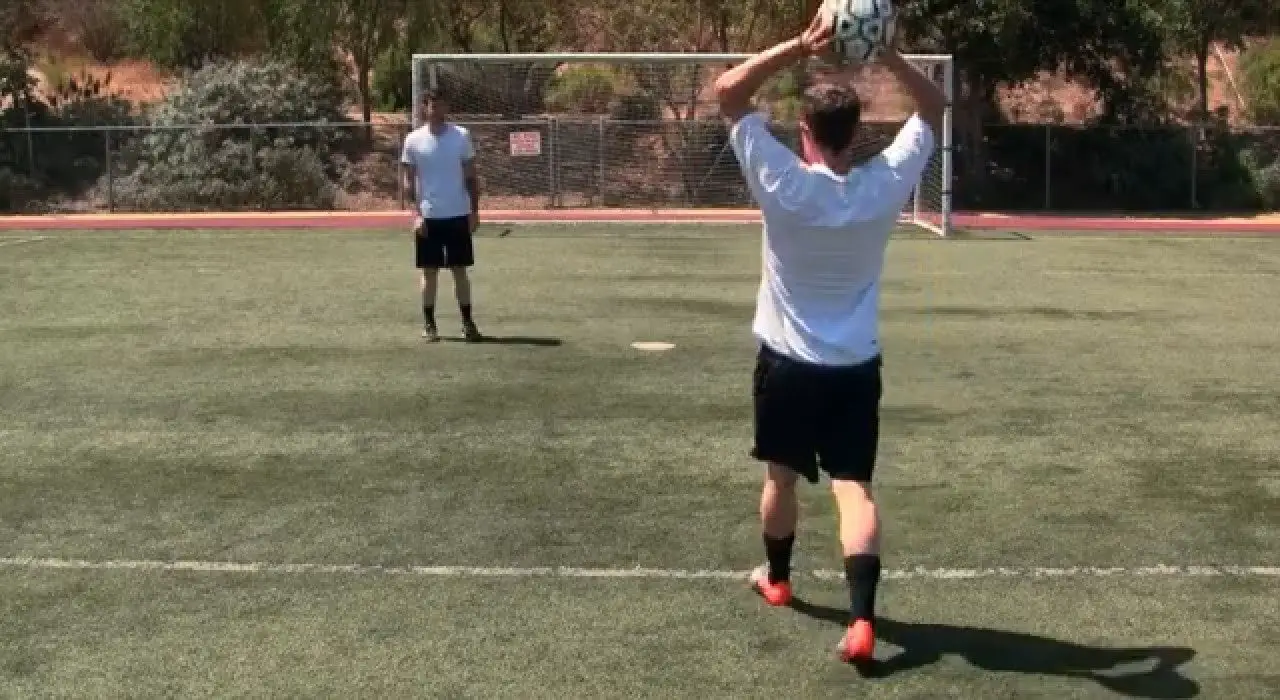
- Throw the ball with both hands from behind and over the head from the point where it left the field of play.
So, the referee may call a “foul throw” when:
- The ball is delivered from a point other than where the ball left the field of play. Referees will allow you to take the throw a couple of steps away from where the ball went out, but only a few steps. It is about common sense: half a metre out is ok but if your throw-in is taken 2 metres out you will be called out.
- Lifting one of your feet off the ground when taking the throw-in.
- Stepping over the touchline.
- Not taking the ball behind your head. You cannot take a throw-in like in basketball. But, you will be also called out if you do not start your arms movement from behind your head. Simply throwing the ball from the top of your head, almost dropping the ball, is likely to be called out.
- Not using both hands. You cannot take a throw-in with an underarm-bowl or overarm throw like a goalkeeper.
- Using one hand more than the other. This is not such an obvious infringement, but referees will call it. For example, you cannot use one hand to apply spin (as players do in a rugby line-out).
Other rules involving throw-ins.
Foul throws are not the only infringements related to throw-ins. Other situations may compromise your team, or you can take advantage of:
- A goal cannot be scored directly from a throw-in. If the ball enters the opponents’ goal, a goal kick is awarded. If the ball enters the thrower’s goal, a corner kick is awarded.
- A goalkeeper cannot handle a ball thrown directly to him or her by a teammate. This cannot be circumvented by the keeper using the feet first before handling the ball.
- The thrower must not touch the ball again until it has touched another player.
- If an opposing player fails to respect the required distance (2 m) or unfairly distracts or impedes the thrower, they may receive a yellow card for unsporting behaviour. So, make sure that the opposition gives you space, if they don’t, let the referee know.
- Delaying the restart of play can result in a yellow card. For example, you will receive a yellow card if you take a few seconds to throw in, but then leave the ball for a teammate to take it.
Now that you know the rules, lets’ have a look at the two types of throw-ins and the recommended techniques to execute them.
Short throws
Use short throws when teammates are close to you without obstructions. You will often use this technique when you want to quickly restart play. However, be careful of your technique as foul throws are more often committed in short throws.
A couple of tips for short throw-ins:
- You do not need momentum. So, the only thing you need to do is to make sure that your feet are in the ground and you throw the ball with both hands from behind and over your head. No need to run towards the line, arching your back, etc.
- Throw the ball to your teammate’s feet. You want to make sure you keep possession of the ball. So, keep it easier for your teammates to control the ball.
- Quickly get back into the field after taking the throw-in. It is likely that your teammates are closely marked from behind and not able to turn. Because opposition players are not able to be closer than 2 meters, if you quickly get back in play, you will be unmarked to provide a passing option.
- Do not throw the ball to a teammate too close to you. If a teammate is closer than 1 meter, it is very hard to release the ball to their feet following the right procedure. You will be tempted to follow with your hand beyond the top of your head, which is a foul throw. Try this, in front of a mirror execute a throw-in 30 to 50 cm away from your feet and look at your hand movements.
The video shows a good drill to practice short throw-ins. However, I’d practice this exercise with the cones closer to the player.
Long throws
Many professional teams take throw-ins seriously. A long throw-in has become an effective dead ball situation. A throw-in close to the box can be as dangerous as a cross or a corner kick.
Long throw-ins are not about size or musculature. It is all about momentum. So, you want to run up to the line when you are taking the throw. This will give you great momentum. Give yourself room, take about three to five steps back.
Once you’ve taken a few steps back from the touchline, start by holding the ball in front of you. After around two or three steps, lift the ball behind your head as far as you can and start arching your back. When you are coming up towards the touchline, finish arching your back and release the ball with a flick forward.
So, the run-up starts some momentum and the flick starts the power generation from the feet into the legs, through the back into the shoulders, and finally into that slingshot motion through the arms.
Again, make sure that your feet are in the ground when you release the ball and that you release it from the top of your head.
The video below goes over the steps described above and how to receive a throw-in.


